


Portainer is a container management software which offers an easy to use user interface for deploying and managing all your Docker needs! Here’s how to install it in 10 seconds
Requirements
If you don’t already have Docker, run the following command to install it! You need to do this on a user with root/sudo privileges.
curl -fsSL https://get.docker.com -o get-docker.sh && sh get-docker.shNotes on storage
I would recommend you choose a specific location where you keep your docker volumes. By default they are stored in /var/lib/docker/volumes, which is on the OS disk.
For a Raspberry Pi, that might be a microSD, so you want to avoid writing/reading to/from it as much as you can to lengthen its lifespan.
There isn’t much to worry about if you do install it on your microSD though, it’s very lightweight, but I’d suggest you consider getting an external SSD/HDD. You will likely need an external HDD eventually for backups anyway!
Installing Portainer
On OS disk/microSD
docker run -d -p 8000:8000 -p 9000:9000 --name portainer --restart=always -v /var/run/docker.sock:/var/run/docker.sock -v portainer_data:/data portainer/portainer-ce:2.20.1On internal/external disk:
Make sure to change /path/to/your/disk/portainer with the actual path. What I like to do is mount my disk in /volumes and have portainer in /volumes/portainer
docker run -d -p 8000:8000 -p 9000:9000 --name portainer --restart=always -v /var/run/docker.sock:/var/run/docker.sock -v /path/to/your/disk/portainer:/data portainer/portainer-ce:2.20.1That’s it! Now you installed Portainer and you can configure it and use it for your needs!
Further Steps
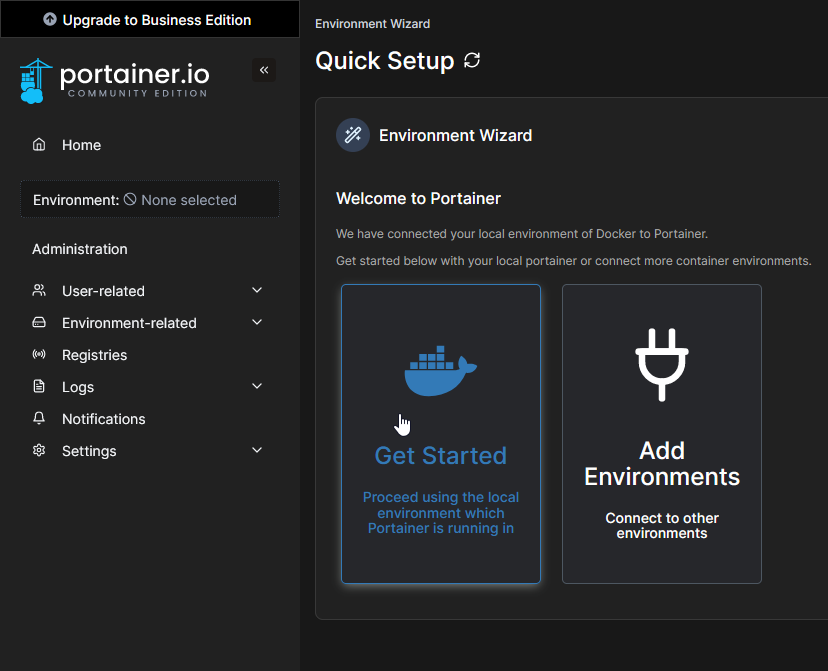
Go to http://YOUR_IP_HERE:9000, or http://127.0.0.1:9000 if you’re on that same computer and setup your admin account. I recommend using Bitwarden or Keepass to generate and store your passwords.

Then click on Get Started to see your local environment. If you already had containers running either using docker run or docker compose, you will see them here.

Docker Compose and Portainer Stacks
Compose files allow you to define in YAML format how you want your containers to run. This makes it very easy to setup and update container configurations for one or multiple applications.
Portainer “Stacks” are just fancy naming for using compose files in Portainer’s interface. Whenever you see in one of the articles here that a compose file is used, you can just copy and paste it in a new stack.
Using stacks
For this example, let’s say you want to install the amazing music-assistant:
-
Create a new stack in Portainer
-
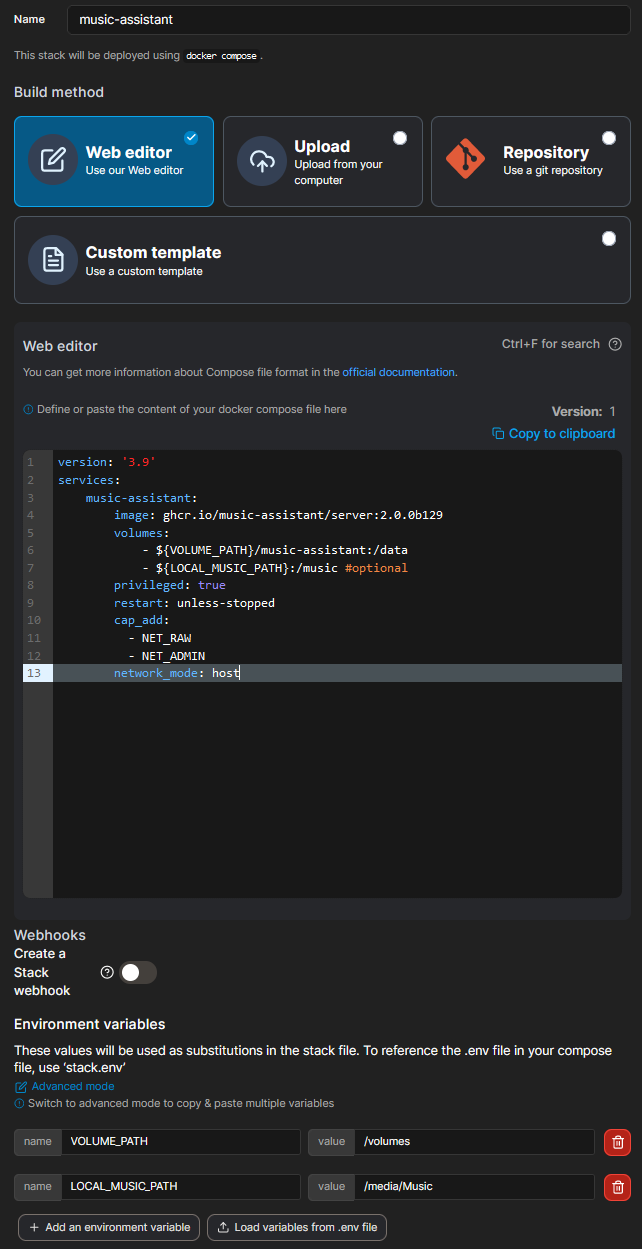
Give it a name

-
Paste the following YAML in the Web Editor
YAMLversion: '3.9' services: music-assistant: image: ghcr.io/music-assistant/server:2.0.0b129 volumes: - ${VOLUME_PATH}/music-assistant:/data - ${LOCAL_MUSIC_PATH}:/music #optional privileged: true restart: unless-stopped cap_add: - NET_RAW - NET_ADMIN network_mode: host -
Add two new environment variables called
VOLUME_PATHandLOCAL_MUSIC_PATH(optional) and set them to where you want your volume to be and where your local music path is(optional).
-
If you’ve done everything right it should look something like this
Click me

-
Deploy the stack


That’s it!
Advanced Tips
- For easy management set a shared location for your volumes. I usually use
/volumes - Always use Environment Variables for all sensitive data, such as usernames, passwords, volume paths, ports, IPs, and so on. Generally, if something needs configured, you should use environment variables
- If you want to automate updates via github or share your compose file for any reason you want to avoid accidentally revealing any of the sensitive information.
While I do not recommend security through obscurity, it makes sense to have your gold in a safe, not on your front porch.
- If you want to automate updates via github or share your compose file for any reason you want to avoid accidentally revealing any of the sensitive information.
- Don’t use
network_mode: hostother than for testing, initial setup, and unless you really have to- Manually set every port your application needs to use
- Never use `privileged: true`, ditto the above
- Set any capabilities and give access to any devices needed via cap_add, devices and volumes
- Use centralized logging such as Loki
- Setup backups for all of your containers using Duplicati
- If you have multiple containers using the same database type, such as Postgres, set up a single container for the database and create a user and database for each application
- Having multiple databases wastes resources. It is highly unlikely you need a dedicated database for every container. It will vary depending on the hardware, but, on average, databases are capable of handling hundreds of transactions per second. This post found that a measly Pi 3B can handle 17+million transactions per day
- Always pin a version, never use the `latest` tag
- Semi-automate your container updates with renovate by hosting them on a private github repository
- Always verify the release notes, there might be configurations you need to edit or breaking changes
- Use external/internal storage, not network locations
- Where relevant, and if possible, avoid using network locations. Unless you have 10Gb switches, they will be slower.
- These make sense for media storage for Tube Archivist, Jellyfin and others, though the config/data files for the applications should be on a local SSD whenever possible
Leave a Reply